I missed my mom’s birthday this week!
Not miss miss in the sense that I forgot about it (I am a too good of a daughter for that, of course), but I missed out on it because I couldn’t be there with my family to celebrate together.
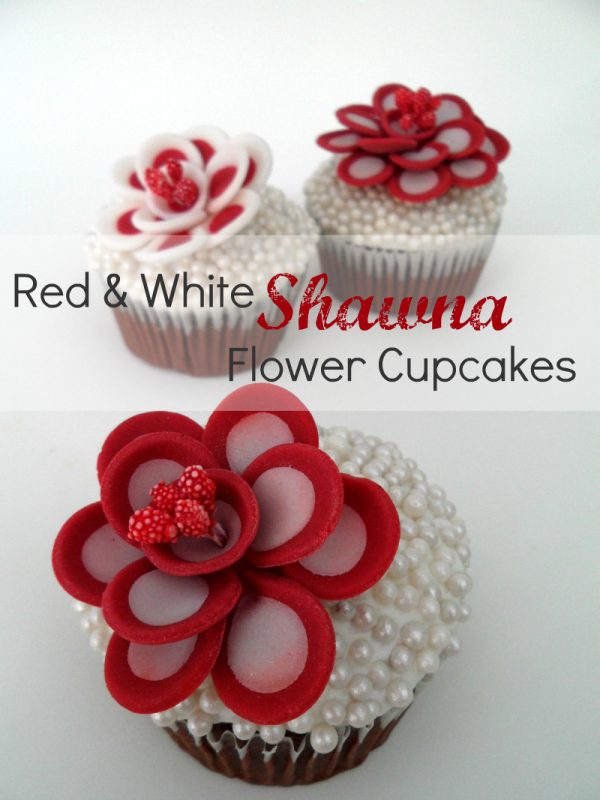
I knew that we would still be traveling around this time of year and never expected to be there. Nonetheless, this is the first birthday in my immediate family that I’m missing during our travels (there are no birthdays in my immediate family for the first 6 months of the year) and I not only miss spending time with my family, but I also miss making a birthday cake for such occasions.
My mom always made special birthday cakes when we were little. Now, since I dipped my toes into cake decorating for the first time 2.5 years ago, I have tried to make a special birthday cake for the members of my family as often as possible, like this one here, or this and this one.
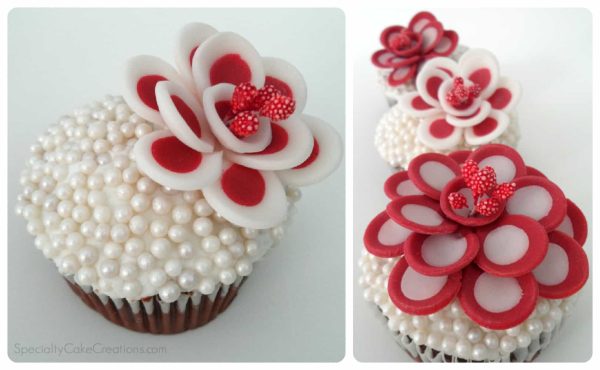
So, since I wasn’t able to make my mom a birthday cake this year, I feel like dedicating these flower decorated cupcakes to her.
I doubt I would ever have developed a passion for baking if it weren’t for my mom. For as long as I can remember, baking was the first thing us girls helped within the kitchen. Once I am back home again, I will have to show you some picture proof of these special times I had growing up with my mom.
Happy Birthday mom and thank you for introducing me to the magical world of flour, sugar and icing!
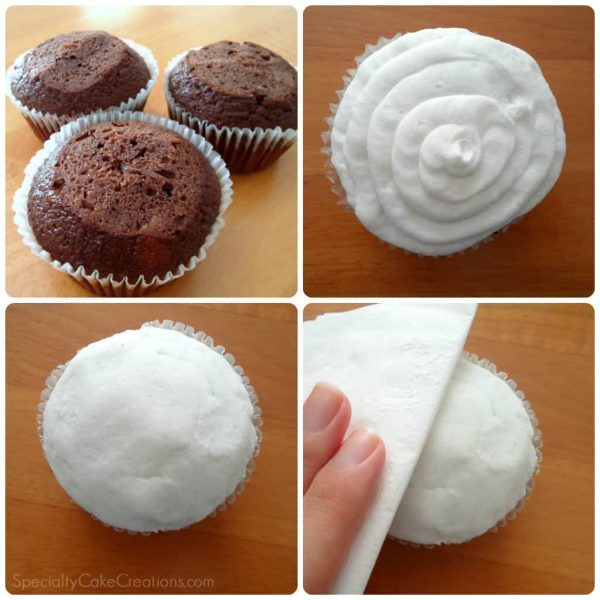
For this project I started out with some banana chocolate cupcakes that I can get in the bakery aisle of our supermarket. They had a fairly high dome that I trimmed off to make them a little more even (the cake scraps may or may not have immediately disappeared in my mouth).
Then, I piped a tight swirl of crusting (important!) icing onto the cupcake with a Wilton round tip #10.
I didn’t want too much icing so I held the tip right on the cupcake. If you like more frosting, lift the tip a little higher and let the icing flow freely into a swirl.
Now, wait a bit to give the icing time to crust a little. Place a paper towel or napkin on the icing and smooth it out with your fingers. The napkin will not stick to the icing if it has crusted enough. It doesn’t have to be too perfect since sugar pearls will be covering it anyway.
(by the way…I totally intended the clock-wise arrangement of the pictures…or not)
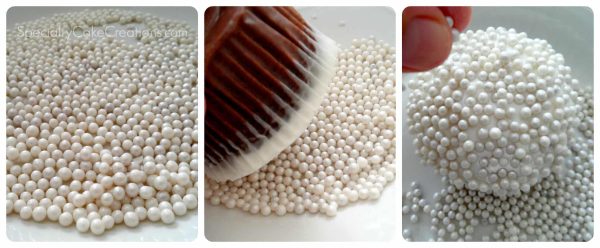
I dumped a whole bunch of white sugar pearls into a bowl and then just slightly dipped and swirled the iced cupcake in them. Not much pressure is required, otherwise, the pearls would disappear in the icing.
If there are still a few empty spots, just sprinkle some more pearls on to cover those.
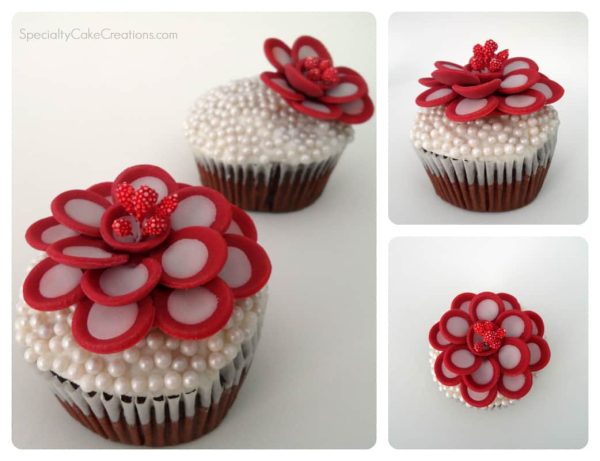
The flowers are inspired by the super-talented Corrie. As far as I know, she only has a Facebook page called CorrieCakes. Corrie’s designs are so creative, and her work is always extremely neat and clean. Corrie, you are an inspiration!
Corrie calls these “Shawna Flower” and you can find a tutorial on her FB page here. I pretty much followed her tutorial, only I used red flower stamens in the centers that I found in a Thai craft store. Wilton has similar ones in white.
I made one big red flower that almost covered the entire cupcake and two smaller ones that just make a nice accent and still let the pearl base show through. I also brushed just a little bit of pearl luster dust on and highlighted the red petals with a little red petal dust.
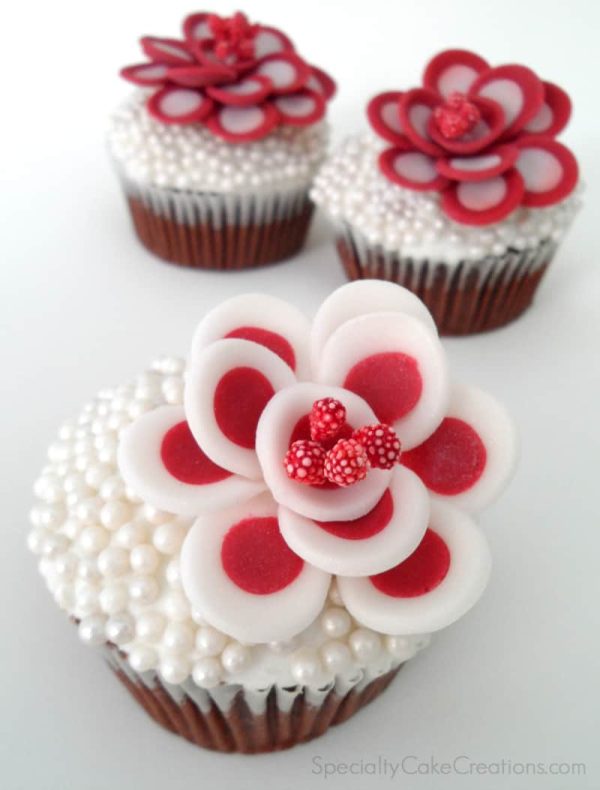
If you ever make these Shawna flowers, please share them with Corrie (and me of course) and she will also post them to her FB page. Maybe you will find mine there as well!
Common Questions
To create red fondant color, you can start with a white fondant base and add red food coloring gradually. Knead the fondant thoroughly until the color is evenly distributed.
Red fondant typically consists of ingredients like confectioners’ sugar, water, gelatin, glycerin, and shortening, along with red food coloring to achieve the desired hue.
Fondant can be dyed naturally using various ingredients like beetroot powder, strawberry powder, or other natural food colorings. These can be added gradually to the fondant and kneaded in until the desired color is achieved.
Yes, you can use regular food coloring to dye fondant. Gel-based food coloring is often preferred over liquid food coloring, as it helps maintain the fondant’s consistency. Add a small amount of food coloring at a time and knead the fondant well to evenly distribute the color.
