This posts has two reasons for celebration. First, it is the 100th post on this blog. In not even 1.5 years I found 100 reasons to post about about something cake related 😀
Also, this is the cake I made for my little sister’s 10th birthday a few weeks ago. I shared with you at the beginning of summer how she requested cupcakes for her last day of school to share with her classmates since she wouldn’t be able to celebrate her birthday with them in the middle of summer.
For the first time she was giving me free reign on the cake. Usually she knows what she would like, but this time she wanted a surprise.
I don’t have to be asked twice for that. Finally a chance to try all the techniques I wanted to for a while already.
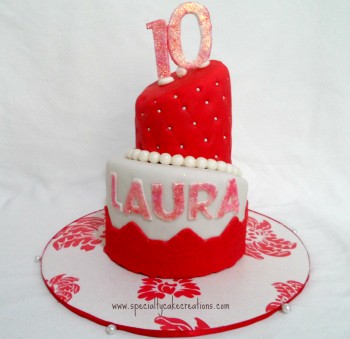
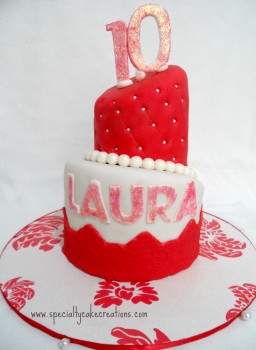
Finally, a topsy turvy cake with lace border on the bottom tier and quilting pattern on top.
It was a vanilla cake with raspberry filling and buttercream, and strawberry cake with chocolate buttercream.
If you are interested, here is how I made my sister’s special 10th birthday cake:
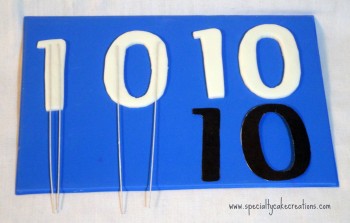
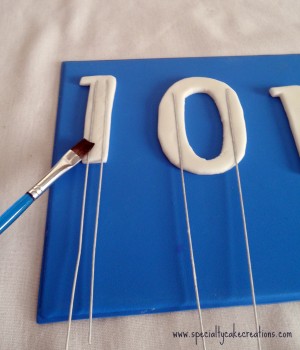
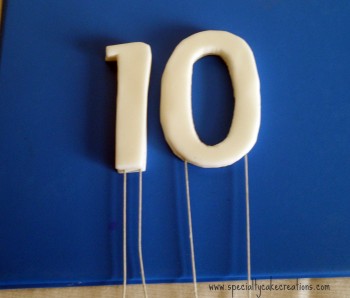
First, the numbers that are to come on top. I printed and cut out a 1 and 0 in a font I liked and traced it on white gumpaste, each number twice. While the gumpaste was still soft I pressed some gumpaste flower wires on one set with a little gum glue and let everything dry for a day.
After a day, I brushed a little gum glue on the wired set of numbers and attached the other pair on top and let them dry a little more. It is very hot and dry here at the moment, so my gumpaste piece dry a lot faster than at other times of the year.
On to the cake…
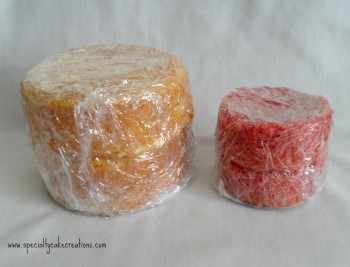
We had only a small family gathering, so I made a 6″ vanilla bean cake; one 2″ high layer and one 3″ high. And also a 4″ strawberry cake; both layers 2″ high.
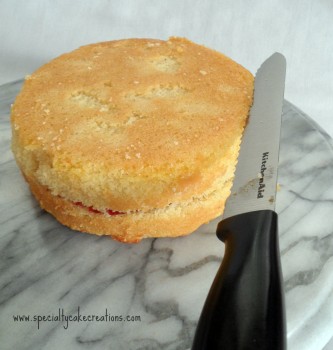
All layers are torted to 1″ height. I filled three layers of the vanilla bean cake with raspberry fruit filling. I did the same with the top to layers but didn’t attach them yet.
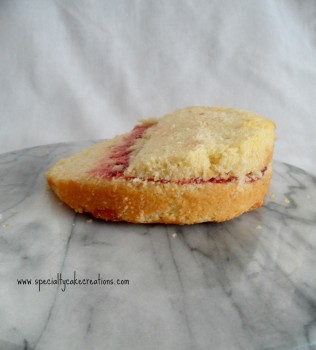
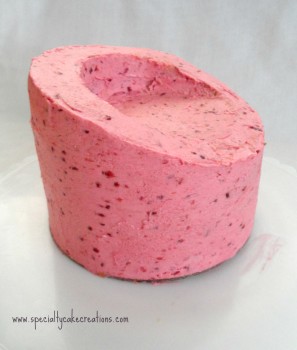
For the topsy turvy effect I carved off part of the cake to create a slope. I simply placed a long serrated knife at the top right and cut aiming for the left bottom.
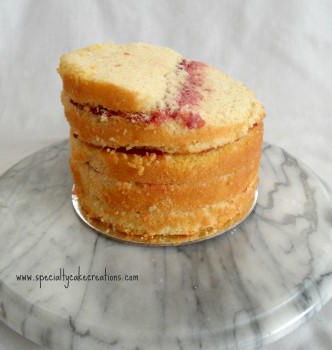
Then I placed the sloped top two layers onto the other three again with some raspberry filling. (Please close your eyes to the rough outer crumb on the cake, for some reason this time I had sticking issues when removing the layers from the pan.)
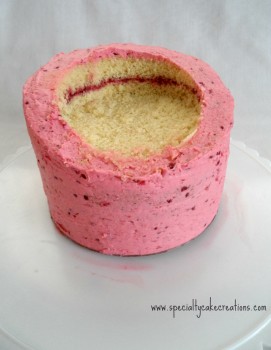
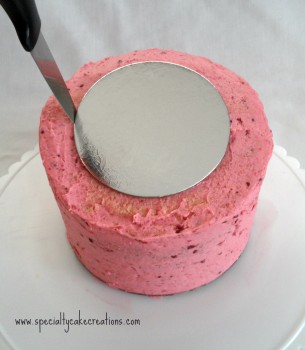
After icing the cake with raspberry buttercream, it is time to prepare the cavity for the next tier.
For that I am using a 4-inch cake board (the size of the top cake), place it onto the bottom tier, and with a small paring knife cut a circle around the cake board. I could also have used a 4″ cookie cutter to make this easier.
With the knife I carefully carve out the cake from within the cut circle trying to get a level surface.
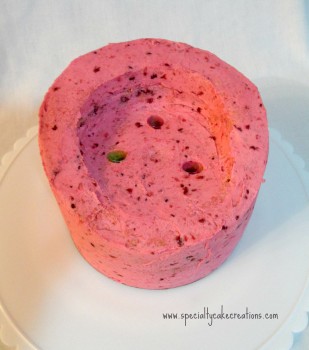
The cavity is also iced with buttercream and then I am inserting three bubble tea straws of the same length for support of the next tier.
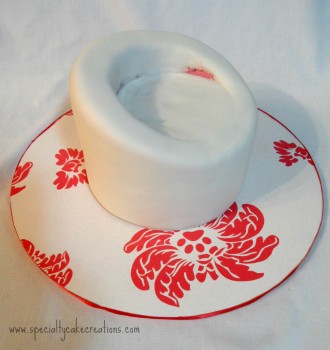
Next, I covered the cake in white fondant and attached it to the prepared cake board. You can see a little bit of torn fondant in the cavity. That’s where I pressed in the 4″ cake circle to make sure it will fit the cake. All of this will be hidden by the top tier anyway.
Almost done with the bottom tier. Onto the next…
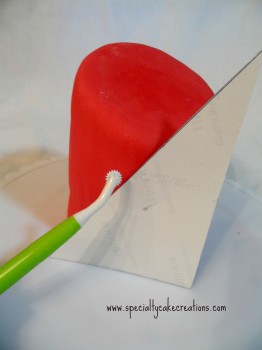
Here I proceeded almost exactly as on the previous one, with the exception that no cavity has to be carved in. Furthermore, I also used a 1″ high cake drum on the bottom for additional height.
The strawberry cake with chocolate buttercream is covered in red fondant. Usually I prefer coloring fondant myself, but red, same as black, are a pain to achieve and the amount of coloring needed will often mess with the consistency. Therefore, I used ready-made Satin Ice red fondant. Their vanilla flavor smells and tastes fantastic.
For the quilting effect I used a trick that the very talented Jessica recently shared on her blog http://jessicakesblog.blogspot.com.
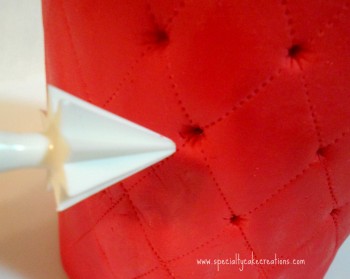
As she recommended, I used photo paper cut at the angle I wanted the lines to go because it doesn’t stick. It will nicely wrap around the cake while tracing along the edge with the quilting tool. Mine is part of a tool set, but you can also get the tool separately.
There is also a little cut mark in my photo paper template, which will make a small indentation for the next line and helps to keep an evenly spaced pattern.
Thank you very much for this great tip, Jessica!
For the pillow fold like effect, where the lines crossed I used this star shaped gum paste tool. Mine is from the same set as above, but this tool is also available separately. All the indentations where then filled with one white sugar pearl.
With a little bit of royal icing in between I stacked the tiers on top of each other.
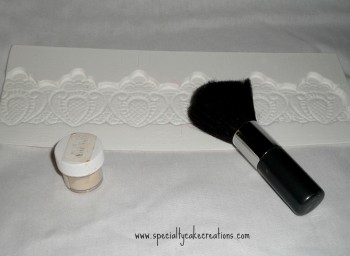
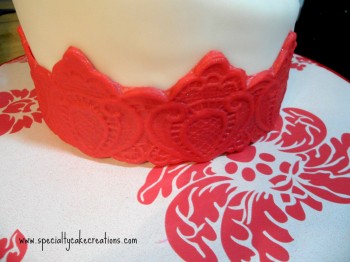
For the lace border on the bottom tier I first brushed my lace mold (this one is very similar to mine) with a little bit of ivory luster dust.
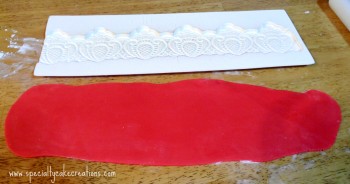
Then I rolled out a strip of red fondant in approximate width and height of the mold.
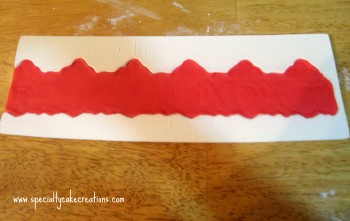
Place the fondant onto the mold and gently press down evenly all around for the fondant to take on the imprint. With a small paring knife cut away all excess along the edges of the lace pattern.
Brush the back with a little bit of gum glue and carefully attach the lace to the cake. I needed another half strip to go around the cake. Try to have the seam lines meet in a way that completes the pattern.
To complete the design I placed a white pearl border in between the tiers. From white fondant I cut out the letters of her name and made them stand out with some strawberry red disco dust; I did the same with the numbers on top of the cake.
I hope you enjoyed this tutorial. Let me know if you have any questions or feedback, I am always happy to hear from you 😀
As August is coming to an end I wish we all can make the best of what is left from the summer.

Thanks for the tutorial. Cake came out great! Kathy
Thats fantastic to hear, Kathy!
Do you maybe have a picture you would be willing to share? Maybe on Facebook?